Create Front-End of a YouTube Web App using Anvil


Introduction
As Python experts and technical enthusiasts, we're always looking for better ways to streamline our development process and create efficient, user-friendly applications.
With the increasing popularity of low-code tools, developers can now leverage powerful platforms like Anvil to build the front end of web applications with minimal coding effort.
In this article, I'll build the user interface (UI) using Anvil, a versatile tool that allows you to design the front end of your web app using a simple drag-and-drop approach while still using Python for the backend and connecting different elements of the front-end.
We will be creating a basic app that fetches data from YouTube API, taking two essential inputs: the YouTube channel ID and the YouTube API secret key. The main focus of this article is to demonstrate how to build the User Interface (UI) of the app using Anvil.
We will dive into the details of constructing the backend code in a separate article, ensuring that you have a comprehensive understanding of both frontend and backend development with Anvil.
Steps to setup the base of the app
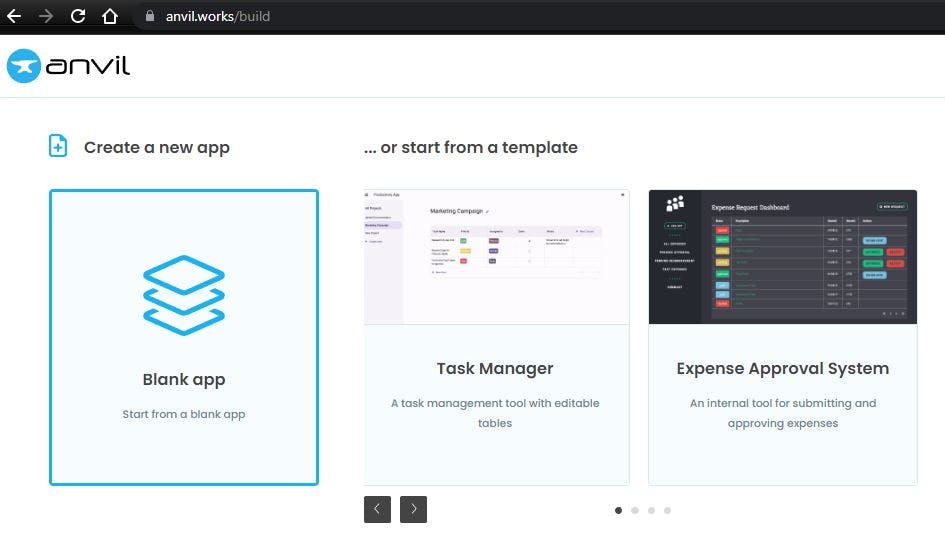
1. Once you are logged in, Go to anvil.works/build and select "Blank app".
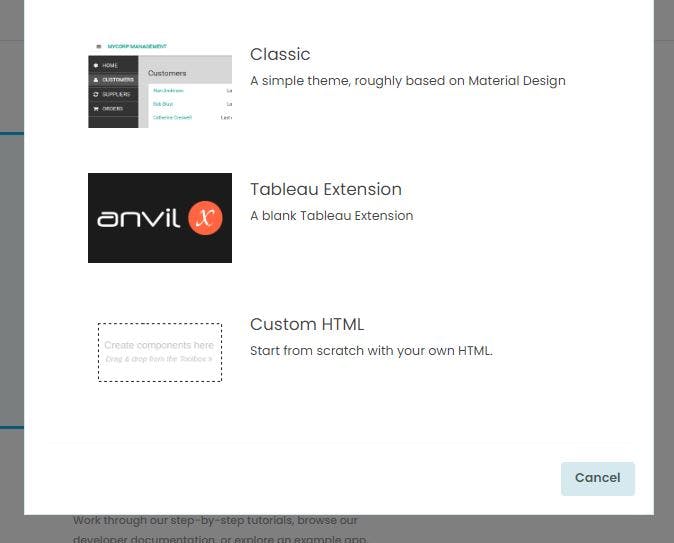
2. Next select the Custom HTML theme for the app.
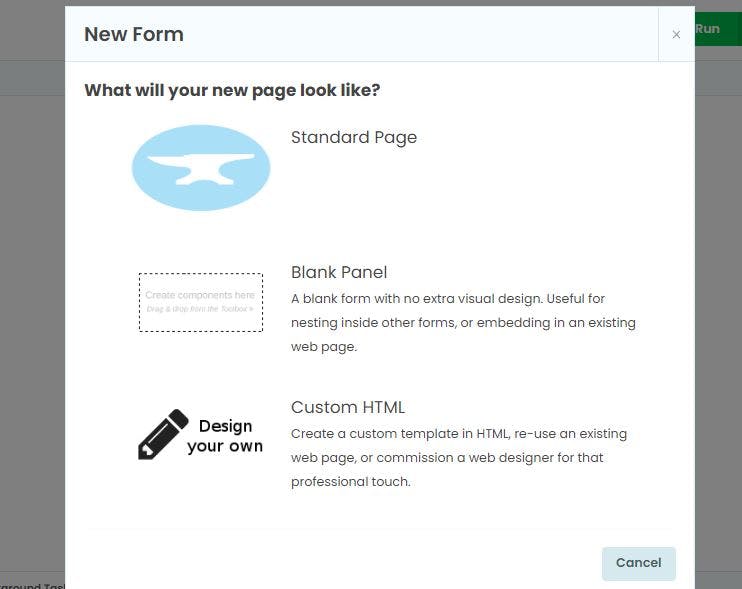
3. Select "Blank Panel" form as we want to create the user interface of our app from scratch.
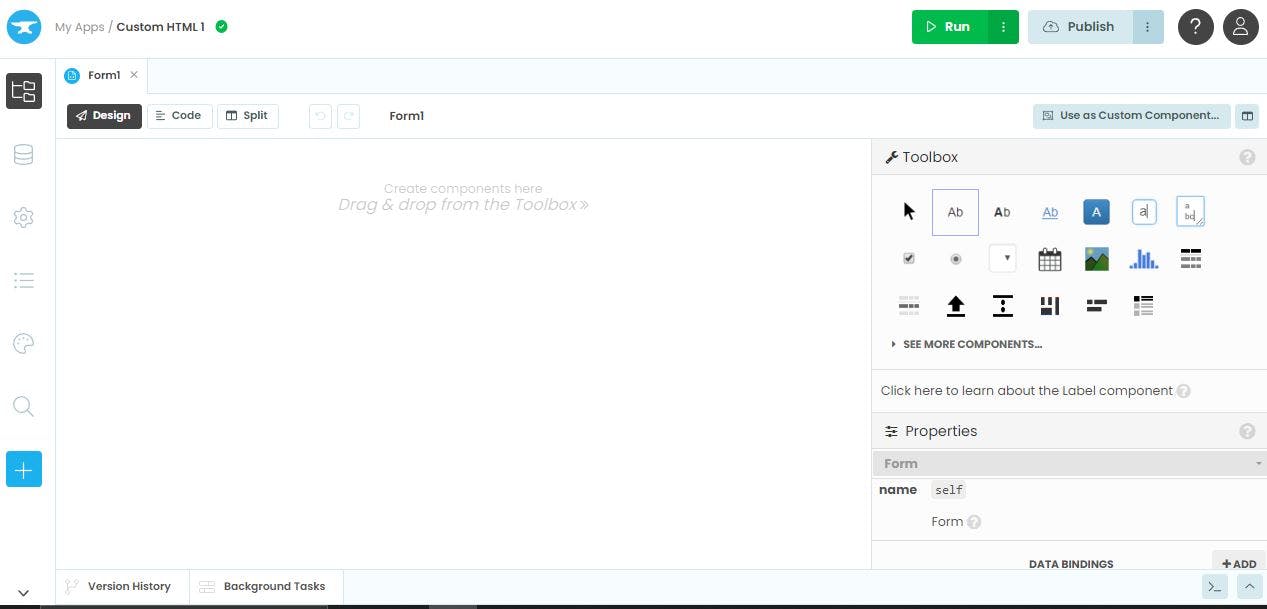
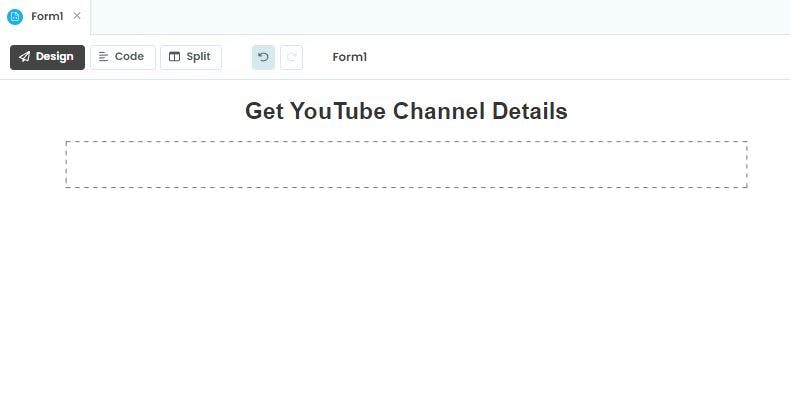
4. As you can see below, we will get a blank canvas or form. Let's build the UI for the app.
Build Front-End of your web app
Add a title for the app
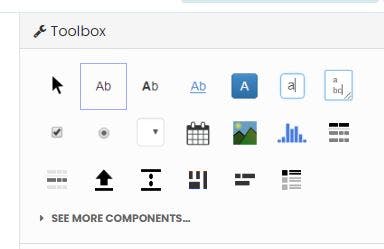
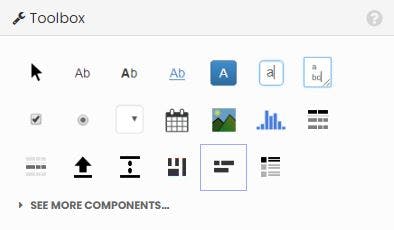
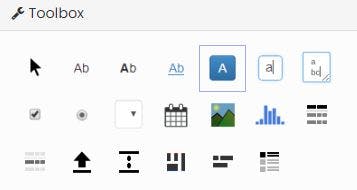
1. Select the Label tool from the Toolbox that can be found on the right-side panel.
2. After selecting the Label tool, click on the blank form to add the label box.
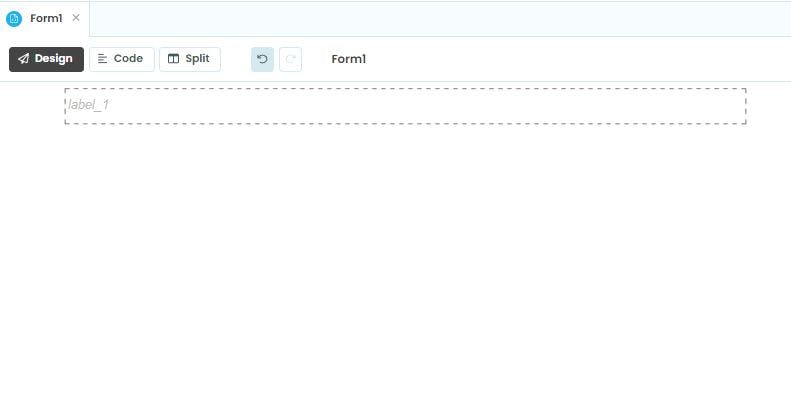
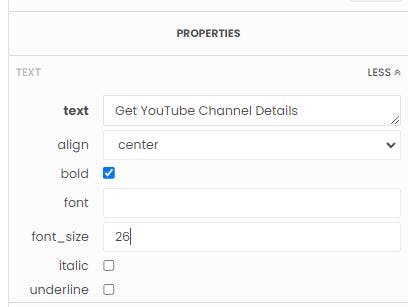
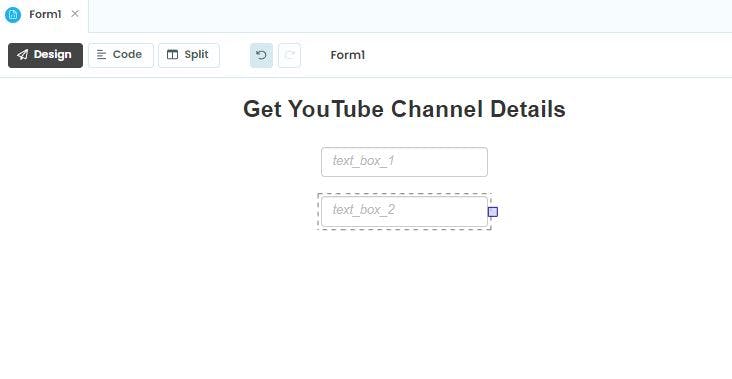
3. Scroll down the Toolbox and go to the PROPERTIES section. Update the text field to "Get YouTube Channel Details" and set the alignment to center.
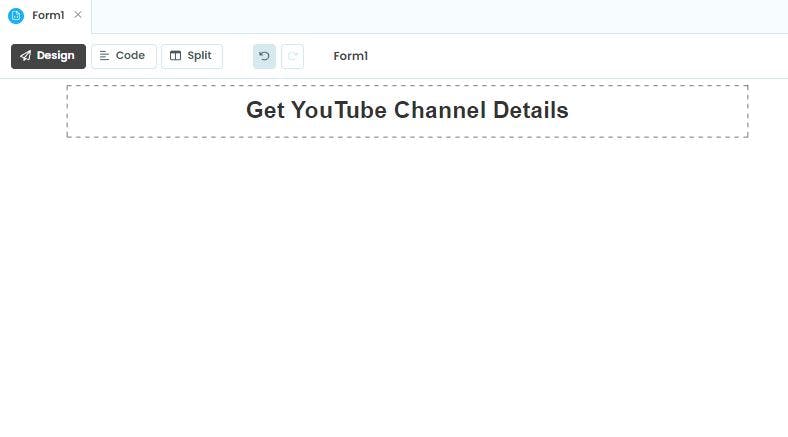
The front-end of the app will now look like this with the title.
Add text-input fields
Before adding the text-input fields, we will add flow panels. Inside these flow panels we will then add the text-input fields.
1. Select the Flow panel tool from the Toolbox.
2. After selecting the Flow panel tool, click on the form just below the title to add a flow panel.
3. Add another flow panel just below the previous flow panel.

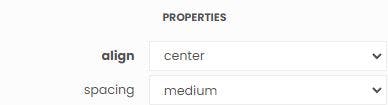
4. Center-align flow panels. This will help in keeping the text-input fields at the center.
Scroll down the Toolbox and in the PROPERTIES set alignment as 'center'. Do this for both the flow panels.
5. Select TextBox from the Toolbox to add the text-input field.

6. Click inside the upper flow panel to add the textbox in the UI.
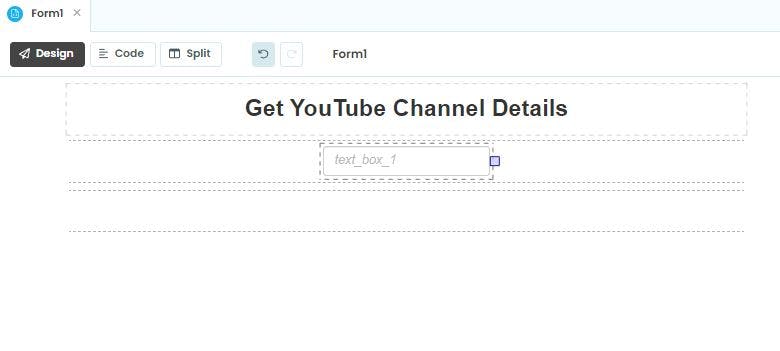
Again select the TextBox tool and add click inside the second flow panel to add another text-input field.
7. Change the variable names of the textboxes. It is advisable to use intuitive variable names for the UI components in Anvil because these are used in building the logic in Python.
Change the variable name of the first textbox to 'channel_id' because we will take the YouTube channel's ID from this input field.
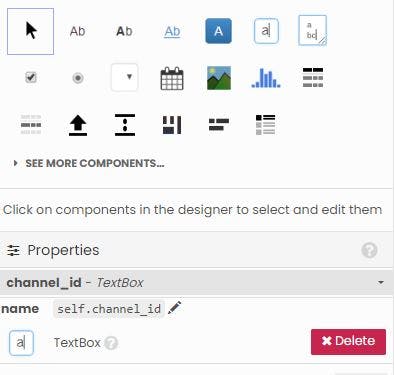
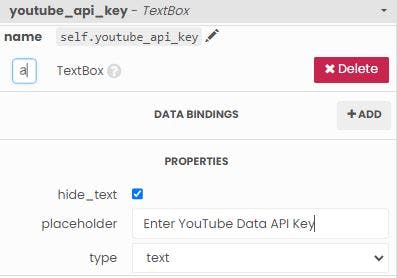
Similarly, change the variable name of the second textbox to 'youtube_api_key'. In this field, the user would specify his/her YouTube Data API key.

8. Change placeholder-text of the textboxes.
For the first textbox, let's specify the placeholder text as "Enter YouTube Channel ID".
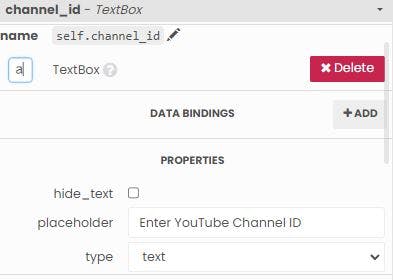
The placeholder text will appear in the textbox as long as the user does not enter any value in it.
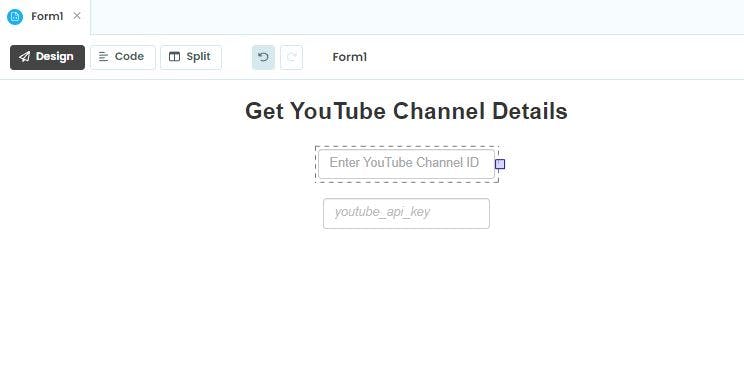
Similarly, specify the placeholder text for the other textbox. Also, enable the hide_text parameter to keep the YouTube API key hidden while getting entered by the user.
Add a button to the form
Now we will see how to a button to submit the input details in the form. Clicking this button will send the specified YouTube channel ID and the API key to the server and the code in the server will fetch some channel information and send it back to the front end.
However, we will add the server code in the next article.
First, you have to select the button tool from the Toolbox.
Click on the form below the lower flow panel to add the button.
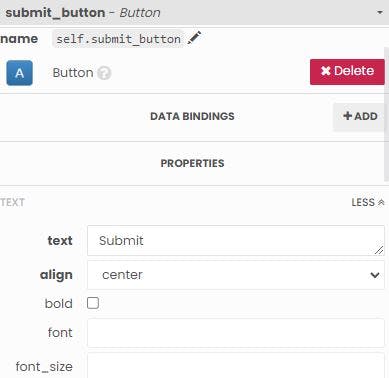
Now let's change the variable name of this button and use some intuitive name like "submit_button".
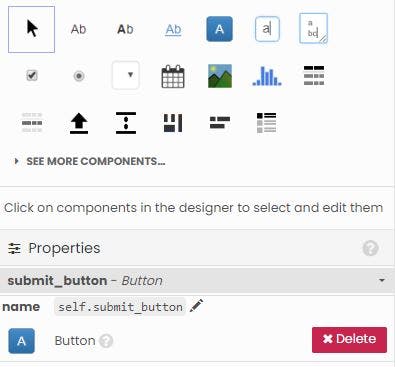
Also change the display text on the button to "Submit".
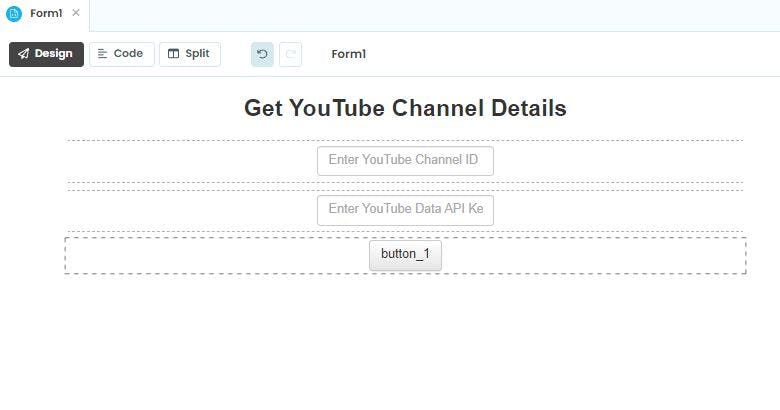
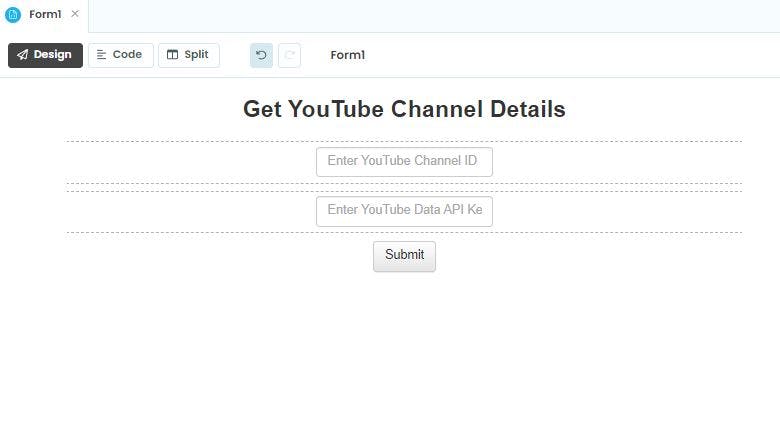
The final front-end will look as shown below. It has a title, two text input fields and a button.
Run your Anvil app
At the top-right corner, there is a green-colored button called "Run". Click on it and your app will be up and running.

You will be able to enter details in the input fields and click the Submit button, however, nothing will happen since we have still not developed the server code.
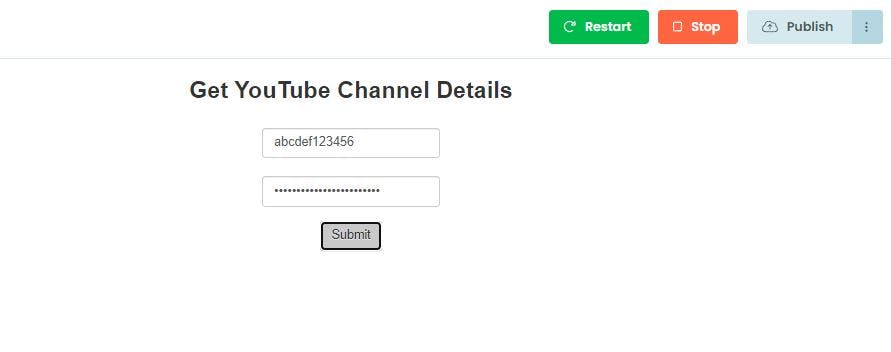
To stop the running app, click on the Stop button and it will take you back to the edit mode.
Final Remarks
Stay tuned for the next article in this series where I will cover how to build the server code for this app.
If you are interested in the topic of using Python for YouTube, then do check out this blog post on programmatically generating YouTube Shorts videos.